


What Are the Design Rules for 3D Printing?
Navigation
- Understand Wall Thickness
- Manage Overhangs and Supports
- Consider Printing Orientation
- Account for Tolerance and Fit
- Optimize Materials Uses
- Respect the Minimum Feature Size
- Incorporate Escape Holes for Hollow Parts
- Avoid Warping in Large Flat Areas
- Enhance Aesthetic Appeal and Functionality
- Continuously Learn and Adapt
- The Bottom Line
The design process in 3D printing is paramount to achieving successful results. This article sheds light on 10 design rules that one must consider when venturing into the world of 3D printing:
Understand Wall Thickness
Wall thickness is critical in 3D printing, dictating the minimum thickness your model should maintain throughout. This aspect is vital for ensuring both the stability and longevity of the final printed object. When walls are too thin, they become prone to breakage or may not even print correctly, compromising the structural integrity of the object. On the other hand, excessively thick walls are not only a material drain but can also lead to internal stress within the object, potentially causing warping or deformation during the printing process. Therefore, it’s important to strike a balance in wall thickness, which varies depending on the type of material used and the intended purpose of the object. For instance, a decorative piece may not require the same wall thickness as a functional mechanical part. Understanding the characteristics of different printing materials and how they interact with wall thickness is key to optimizing your design for both durability and material efficiency.
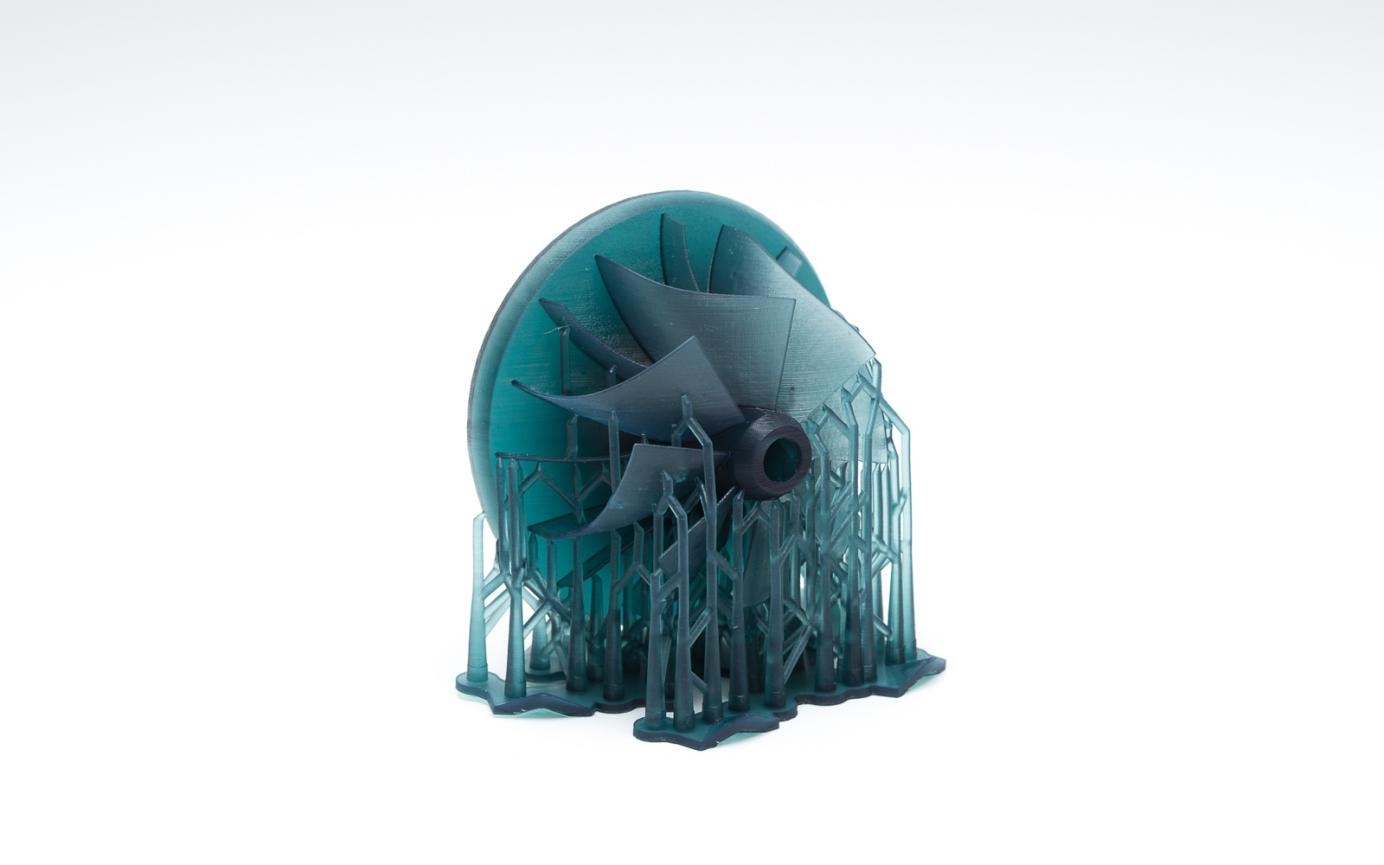
Manage Overhangs and Supports
Overhangs in 3D printing are sections of the model that extend beyond a 45-degree angle, and they usually necessitate the addition of support structures. These supports are indispensable for preventing parts of the print from sagging or collapsing during the printing process. However, it’s crucial to strike a balance in their use. Excessive reliance on supports leads to increased material consumption and can complicate post-processing, requiring additional time and effort to remove these supports and smoothen the surface. Smart design modifications can be implemented to circumvent these issues. For example, by incorporating angles less steep than 45 degrees or adding fillets and chamfers, one can reduce the need for supports, thus streamlining the printing process. This approach not only saves on material but also preserves the aesthetic quality of the printed object by minimizing the marks or blemishes that supports often leave behind.
Consider Printing Orientation
The orientation of a print in the 3D printer significantly impacts both its aesthetics and structural strength. This is because 3D printing builds objects layer by layer, and these layers determine the points of strength and weakness in the final product. Parts printed in a vertical orientation often exhibit weaknesses along the vertical axis, as the layers can separate under stress. Conversely, horizontal printing can improve strength but may affect the resolution of certain details. Therefore, it’s crucial to consider how the object will be used and where the stress points might be. Orienting the object in such a way that the layers align perpendicularly to the stress points can significantly enhance its durability. Additionally, the orientation can affect the surface finish of the print. For example, curved surfaces may appear smoother when printed in certain orientations. Therefore, balancing the need for structural integrity with the desired aesthetic outcome is a key consideration in determining the print orientation.
Account for Tolerance and Fit
Tolerance in 3D printing refers to the allowable deviation in dimensions, essentially the small gap you need to leave between two parts to ensure they can be assembled after printing. This gap compensates for the inherent inaccuracies in the printing process and the slight variances in material behavior. Neglecting to incorporate proper tolerance can result in parts that are impossible to fit together – either too snug or excessively loose. The required tolerance varies depending on the printer’s resolution, the material used, and the size and design of the parts. For instance, printers with higher resolution can achieve tighter tolerances. Similarly, materials that shrink or warp more upon cooling require larger tolerances. Accurately gauging and applying these tolerances requires not only understanding your printer’s capabilities but also considering how the printed object will interact with other components, whether they are 3D printed or not.
Optimize Materials Uses
The choice of material in 3D printing is pivotal, as different materials offer different strengths, flexibility levels, and temperature resistances. The selection process should align with the specific requirements of the project. For instance, a part that needs to withstand high temperatures would benefit from a heat-resistant material like ABS or Polycarbonate, whereas a flexible, wear-resistant component might be better suited to TPU. Beyond material selection, optimizing the design for material efficiency is equally important. This involves designing structures that are strong yet use minimal material, thus saving costs and reducing environmental impact. Techniques like hollowing out solid sections, using a honeycomb internal structure, or reducing the density of support structures can substantially decrease material usage without compromising the structural integrity of the printed object. This thoughtful approach to material usage not only makes 3D printing more sustainable but also more economical, especially for large-scale or mass production scenarios.
Respect the Minimum Feature Size
Minimum feature size dictates the smallest detail that a printer can accurately reproduce. This covers elements like tiny holes, thin walls, small embossed or engraved text, and intricate decorative details. Each printer has its limitations in terms of the smallest feature it can effectively print, which is largely determined by the printer’s technology (for example, FDM, SLA, or SLS) and its nozzle or laser spot size. Ignoring these limitations can result in printed parts that do not match the intended design, with details that are either blurred or completely omitted. This is particularly crucial when printing functional parts like gears or connectors, where precision is paramount. Therefore, it’s essential to design with these limitations in mind and to adjust the finer details of your model to align with your printer’s capabilities. This might mean enlarging small features or simplifying overly complex sections of the design to ensure that the final print is both accurate and functional.
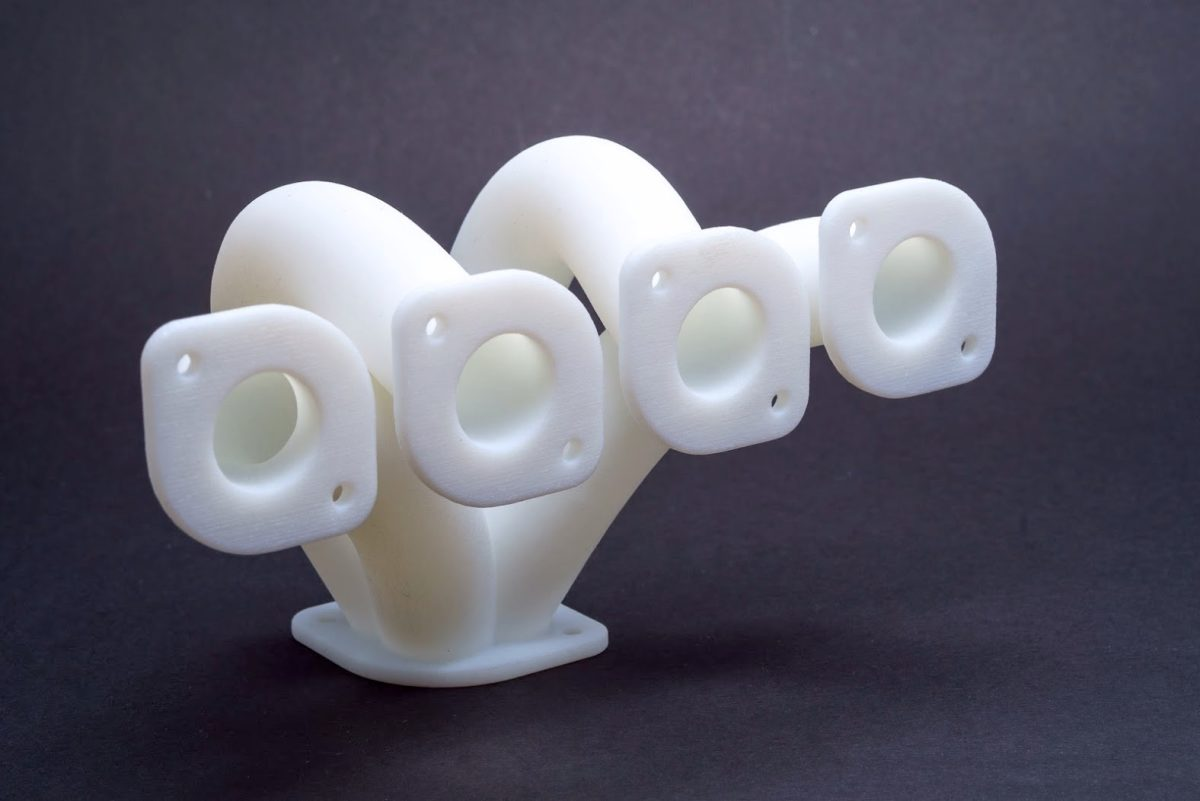
Incorporate Escape Holes for Hollow Parts
When designing hollow objects in 3D printing, incorporating escape holes is a pivotal step. These holes serve a dual purpose: they allow excess or uncured material inside the hollow parts to be removed, and they facilitate the elimination of support materials. In the absence of escape holes, there’s a risk of material build-up inside the object, which can lead to increased internal pressure and potential cracking or deformation. Additionally, these holes play a significant role in reducing the internal stress that could compromise the structural integrity of the printed item. The size and placement of escape holes depend on the size of the hollow section and the type of printing material used. It’s a balancing act between making them large enough to be effective and small enough not to detract from the overall aesthetic and structural integrity of the object.
Avoid Warping in Large Flat Areas
Warping is a common challenge in 3D printing, particularly in large, flat areas. As the printed material cools and contracts, these areas can warp or curl, distorting the final product. To mitigate this, strategic design adjustments are necessary. One effective approach is to integrate ribs or a honeycomb structure into the design. These structures provide added stability and rigidity, countering the forces that cause warping. Moreover, they have the added benefit of reducing material usage, as they create a strong framework without the need for a solid fill. This approach not only improves the print’s dimensional accuracy but also makes it more lightweight and material-efficient.
Enhance Aesthetic Appeal and Functionality
Beyond technical precision, the aesthetic appeal of a 3D-printed object is of paramount importance, especially for consumer-facing products. The design should not only fulfill its functional requirements but also captivate with its visual appeal. This involves thoughtful consideration of shapes, textures, and colors that can be realized through 3D printing. Customization and unique design elements can set a 3D-printed object apart, making it not just a functional piece but also a work of art. This dual focus on aesthetics and functionality is what often makes 3D-printed objects stand out, offering designers a vast playground to express creativity while solving practical problems.
Continuously Learn and Adapt
Staying abreast of the latest developments in technology, materials, and software is crucial for anyone serious about mastering 3D printing design. This field requires a mindset geared towards continuous learning and adaptation. Experimentation is a key part of this process. Testing new materials, playing with different design parameters, and pushing the boundaries of your printer’s capabilities can lead to innovative solutions and improvements in print quality. Being proactive in learning and adapting to new techniques and trends is essential to staying relevant and proficient in the ever-changing world of 3D printing.
The Bottom Line
Adhering to these design rules can vastly improve the quality and functionality of 3D-printed objects. Each rule plays a critical role in the printing process, influencing everything from material selection to the final aesthetic of the object.